Documentation
Cookbook: Maintenance
This recipe will show how to seamlessly switch the webserver to maintenance mode. By that it is understood that no existing connections should be interrupted, but new connections should be notified of the situation. This could be done serving some generic static content.
All this is easily achieved by Cherokee thanks to its Zero Downtime mechanism.
We will be showing a couple of use cases. The first one is mostly to illustrate the general process and will be set to serve a custom HTTP Error. It is very simple and straightforward, but is also pretty useless in a production environment. The second use case will be more advanced. It will be useful to serve a static maintenance message to the public while the administrator will retain the ability to see the actual changes.
Basic Example
The steps are fairly simple:
-
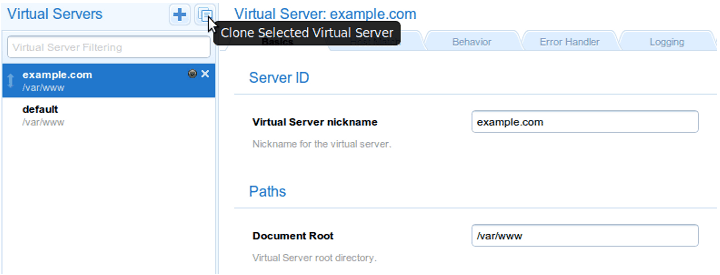
Create a new virtual host, a copycat, that can handle the same domain(s) as the ones managed by the host to be put offline. In this example it is cloed as copy.
 Cloned virtual server
 -
Don’t forget to set up the domains handled by the virtual host.
 Domains
Accepted Domains Domain pattern example.*
intranet_example
-
Also remember setting up whatever response you will be requiring (a custom error, some static content, and so on). We will be setting up the HTTP error handler to give a 503: Service unavailable' message. This is done through the `Handler tab.
 Handler
 -
After this operation, we you should have a sole rule in the copied virtual server managed by the HTTP Error handler.
 Rules
Rules -
The Error Handler tab should specify Custom redirections in the Error Handling hook section.
 Error Handler
 -
Make sure the copycat is positioned above the original virtual host, effectively having a higher priority for it. By default the new virtual hosts are positioned on top of the rest. Just make sure you don’t inadvertently change the relative priorities.
-
Make a graceful restart.
This can be done from the SAVE dialog. By doing this, the existing connections to the original virtual host will be preserved and will eventually end upon completion. At the same time, new requests will be delivered to its copycat and will be handled according to its specified behavior. If you don’t want this behavior you can always make a hard restart, effectively shutting down every existing connection.
By now you are almost done. Now you can make whatever changes were needed to the original host without affecting the incoming connections.
Remember to reverse the process once you are done. You’ll only have to delete the copycat or position it below the real virtual host.
Advanced Example: Static message
-
The first two steps are the same: create a copycat, and make it handle the same domains.
-
Our virtual host will have only two rules. The first one will match against a maintenance directory that will be managed by the "List & Send" handler. Enabling IO/Cache and Encoding will be a plus here since the contents are static by definition. You should probably configure the Directory indexes in the Basics tab of the virtual host for the List & Send handler to work properly. The second one will be the the Default rule that will be redirecting every request to the first rule as an internal redirection.
 Rule list
 -
The Default rule should be managed by the Redirection handler. .Redirections
| Type | Regular Expression |
|---|---|
Internal |
.* |
+

This set up will result in every request being redirected to the maintenance directory.
Advanced Example: Staff review
By now you should be able of switching the server to and from maintenance mode.
The next essential feature needed is to allow specific users to be able to access the original site, not the maintenance version, so that they can view the changes reflected while they are working.
The tweaking here has to take place in the original virtual server. The steps are also fairly simple.
-
In this example we will be adding a new imaginary domain to the list of domains managed by the virtual host. This domain should be accessible from our intranet only. For the purpose of this document, it will be we will use intranet_example.
 Host MatchesNote
As mentioned in the Virtual Servers section, you should keep in mind the way the domain lists are interpreted. Whenever Cherokee receives a request for a specific domain, it evaluates the Domain list of every defined virtual host in the order defined by the priorities of such hosts. If no domain name matches the request, Cherokee re-evaluates the list of virtual hosts as before, trying to match the request against the Nicknames. Only after failing both with the domain names and the nicknames will Cherokee issue the failure. -
And we will add this domain to our /etc/hosts file as an alias for the real server.
10.0.0.118 intranet_example
In this case we are using the IP address assigned to the server in our intranet, and this will grant access from our computer to the original site whether the copycat is present or not.
You might want to reflect such configuration in a private DNS in case you need more flexibility, restrict access to specific IP ranges and similar security measures, but the principles are the same.
