
Documentation
Cookbook: Setting up Concrete5
Setting up Concrete5 with Cherokee is really easy. A configuration wizard is provided that can either be used to install Concrete5 as a new dedicated Virtual Server, or to set it up inside a Directory.
This recipe contains three sections detailing how to: . Configure Cherokee for either installation mode using the Wizard. . Install Concrete5 v3.3.1 which is the last one available at the time of writing. . Configure Cherokee manually.
Configure Cherokee using the Wizard
Two common scenarios are contemplated: installation on a dedicated virtual server (http://concrete5.example.net/, for instance) or under a subdirectory on an existing virtual server (as could be http://example.net/concrete5/).
Setting up Concrete5 as a new Virtual Server
The first step would be to go to the virtual server list page. Once in there, click on the Add button at the top of the panel to show the list of available wizards.
Now, you will have to select the CMS category, and run the Concrete5 wizard. At this stage the Concrete5 wizard will ask you for some basic parameters about the installation. It will try to auto-fill as many entries of the form as possible. For instance, if it finds Concrete5 installed in a standard location it will use that path as the default directory.
The new virtual server will be created after this form is submitted. The virtual server configuration will cover the vast majority of the cases. Most probably it will cover your needs, although you are free to modify it as you will.
Setting up Concrete5 inside a Directory
Concrete5 can also be configured inside a directory. Let’s suppose we want to set up Concrete5 inside the /blog directory of one of our virtual servers.
In this case, the first thing you will have to do is to enter the virtual server configuration you’d like to configure Concrete5 in. Visit the Behavior tab, use the Rule Management button and click on the Add button at the top of the panel.
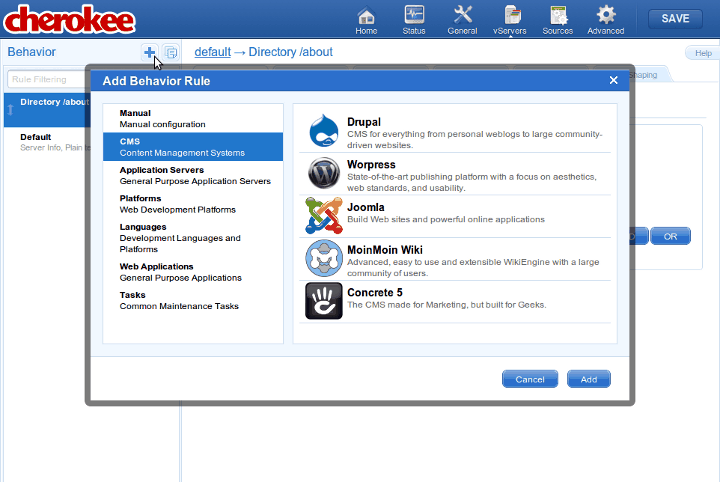
As in the previous case, this wizard will ask some very basic information, including the public web directory where Concrete5 will be set up and the local Concrete5 source directory.
Installing Concrete5
Once Cherokee is ready, only the database issue remains to be able to install Concrete5. Log in to MySQL: mysql -u root -p
And create the database for Concrete5. We will be using the name concrete5, the user concrete5user and the password concrete5password, but you should set up your own.
CREATE DATABASE concrete5;
GRANT ALL PRIVILEGES ON concrete5.* TO concrete5user@localhost IDENTIFIED BY 'concrete5password';
GRANT ALL PRIVILEGES ON concrete5.* TO [email protected] IDENTIFIED BY 'concrete5password';
FLUSH PRIVILEGES;
quit;
Then point your web browser to the point specified when you ran the wizard (i.e. http://localhost/concrete5, http://example.com/, etc) and follow the instructions provided by the Concrete5 installer.
There is not much else you must do for Cherokee to work with Concrete5. If you follow the Concrete5 installer’s instructions -providing valid database information in most cases will suffice-, you will be done in an instant.