Documentation
Cookbook: Setting up Moodle
Running Moodle on Cherokee is easy to do. Since Moodle has relatively high requirements (1GB RAM is recommended), it is actually a very good idea to run a high performance web server and see how things simply start flying.
The only software requirements are a web server, MySQL and PHP with several extensions. You can see the complete list of software requirements at Moodle’s site. Don’t worry about this point. The installer will detail exactly what are the missing modules, soy you can install whatever you need during that part of the process.
Cherokee can be configured in a breeze thanks to the Cherokee Market. After deploying it automatically you can feel free to manually tune whatever parameters you see fit, but no more intervention is really needed.
Setting up Moodle manually
Using the Market is the recommended option to set up Moodle on Cherokee. However, should you wish to do it manually you will just need PHP support correctly configured in Cherokee. Please refer to the PHP Wizard or to the pertaining documentation section about setting up PHP in case you don’t have it available for some reason.
Besides the PHP requirement, nothing else is needed on Cherokee’s part.
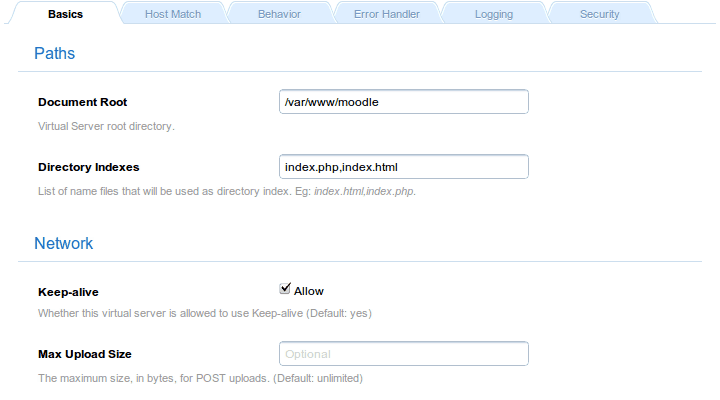
Simply set the Document root to /var/www/moodle and you are ready to go. This is done within the Basics tab of the chosen Virtual Server.

Moodle manula steps
Of course, you will need to download Moodle from the download site if you don’t already have a copy.
For this example we will be using moodle-weekly-19, which is the recommended option at the time of writing.
Uncompress it to a directory of your choice, like /var/www/moodle, and remember changing ownership to that of the user under which Cherokee will be running.
First download and uncompress the distributed Moodle release into /var/www/moodle, and create a database suitable for the installation.
Log in to MySQL:
mysql -u root -p
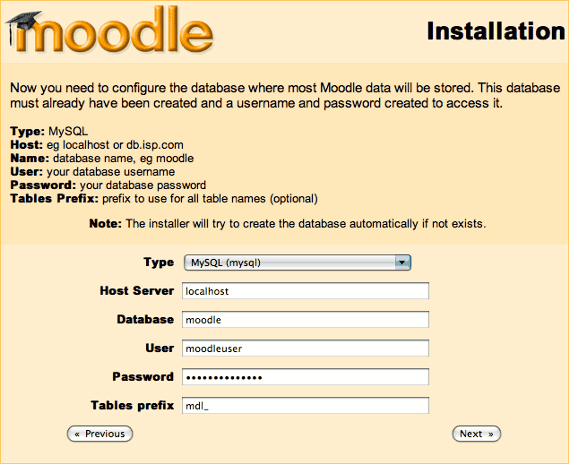
And create the database for Moodle. We will be using the name moodle, the user moodleuser and the password moodlepassword, but you should set up your own.
CREATE DATABASE moodle DEFAULT CHARACTER SET utf8 COLLATE utf8_unicode_ci;
GRANT ALL PRIVILEGES ON moodle.* TO moodleuser@localhost IDENTIFIED BY 'moodlepassword';
GRANT ALL PRIVILEGES ON moodle.* TO [email protected] IDENTIFIED BY 'moodlepassword';
FLUSH PRIVILEGES;
quit;
You will also have to create a directory for Moodle to save data in it. It must be outside the web document tree.
mkdir /var/www/moodledata
chmod 0770 moodledata
chown www-data:www-data moodledata
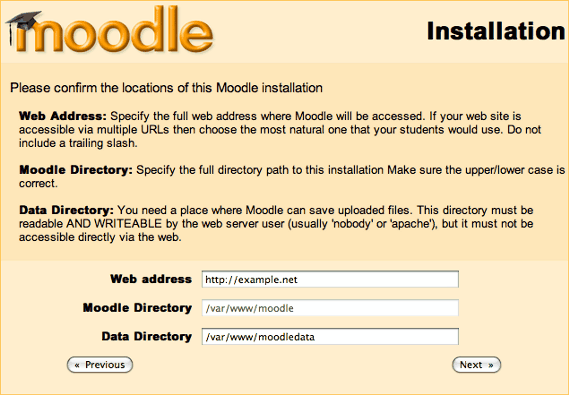
Then point your web browser to http://localhost and follow the instructions provided by the installer. You will only need to provide the above mentioned database information and very little else.
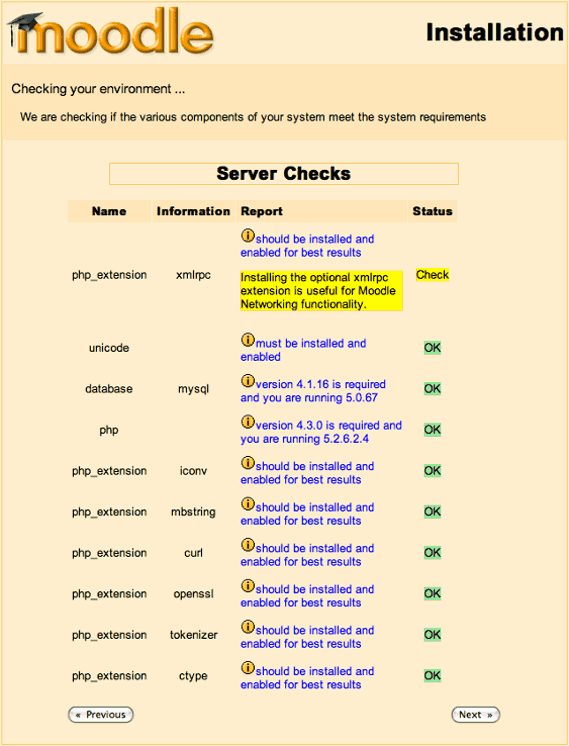
As mentioned before, checks will be performed to see if the needed PHP modules are available. Make sure to have the ones you’ll be needing.
This will get you through the whole installation process in around 20 little extra steps give or take. Just click on continue and you should be fine. It will populate your database and get you through the whole installation process.
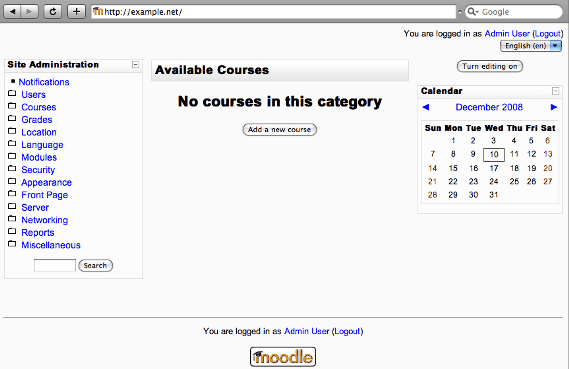
Once you are done, don’t forget to set up your cron tasks and configure the backup settings. You can find all the information to create new courses and everything else there is to know in Moodle’s documentation.
